WengYang Industrial Zone Yueqing Wenzhou 325000
Horas de trabalho
De segunda a sexta-feira: das 7h às 19h
Fim de semana: 10:00 - 17:00
WengYang Industrial Zone Yueqing Wenzhou 325000
Horas de trabalho
De segunda a sexta-feira: das 7h às 19h
Fim de semana: 10:00 - 17:00
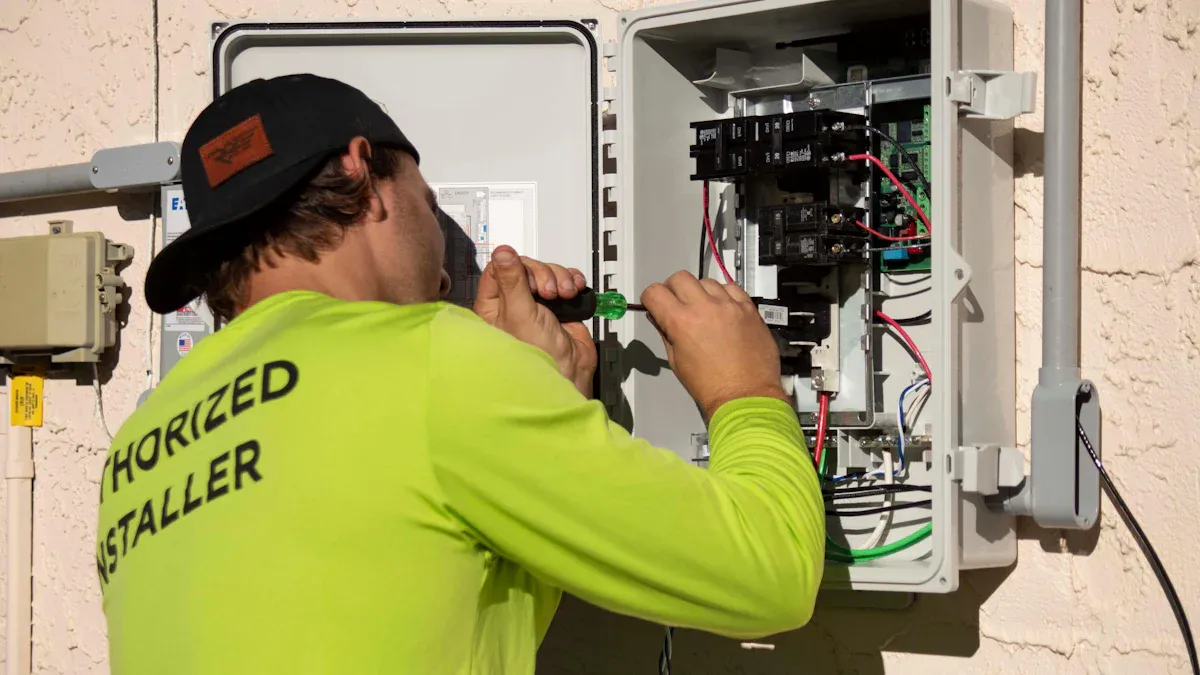
Você pode instalar uma caixa combinadora fotovoltaica da kuangya electrical seguindo um guia de instalação detalhado e priorizando a segurança em cada etapa. A caixa combinadora fotovoltaica gerencia as saídas do painel solar em seu sistema, ajudando a evitar falhas de sobrecorrente, superaquecimento e problemas relacionados à umidade. Sempre use as ferramentas corretas, verifique se a tensão é consistente e use equipamentos de proteção adequados. Revise todas as etapas do guia de instalação antes de começar. Escolha os produtos elétricos da Kuangya pela confiabilidade e conformidade com Normas IEC.
Antes de começar a instalar sua caixa combinadora fotovoltaica da kuangya electrical, reúna todas as ferramentas e componentes de instalação necessários. Ter tudo pronto ajuda você a trabalhar com eficiência e segurança.
Você precisa de várias ferramentas para concluir a instalação. Aqui está uma lista de verificação para orientá-lo:
Se o seu sistema incluir monitoramento de Ethernet, prepare estes itens:
Dica: Sempre verifique se suas ferramentas de instalação estão em boas condições antes de começar. Isso reduz o risco de acidentes e garante um processo de instalação tranquilo.
Uma caixa combinadora fotovoltaica da kuangya electrical contém várias partes importantes. Você encontrará terminais de entrada para cada string de painel solar, terminais de saída para a conexão do inversor, fusíveis ou disjuntores, e dispositivos de proteção contra surtos. A caixa também inclui pontos de aterramento para proteger seu sistema contra falhas elétricas.
Conectores MC4 desempenham um papel fundamental na conexão dos cabos do painel solar à caixa combinadora. Os cabos MC4 comuns funcionam bem para configurações residenciais, enquanto os cabos especializados são adequados para instalações comerciais maiores. Cabos de qualidade melhoram o desempenho e a segurança de seu sistema de energia solar.
Aqui está uma tabela que mostra as especificações típicas do conector MC4:
| Especificação | Valor |
|---|---|
| Fabricante | Multi-Contato EUA |
| Classificação de corrente máxima | 30 amperes |
| Classificação máxima de tensão | 1.000 volts |
| Faixa de temperatura | -40°C a +90°C (-40°F a 194°F) |
Você pode saber mais sobre Normas IEC (dofollow) para segurança elétrica e conformidade.
Talvez você queira adicionar acessórios para melhorar a instalação. Prensa-cabos à prova de intempéries protegem as conexões da umidade. Etiquetas de identificação ajudam a identificar os fios rapidamente durante a manutenção. Alguns instaladores usam abraçadeiras para manter a fiação limpa e organizada.
Observação: Escolha acessórios que correspondam às especificações de sua caixa combinadora fotovoltaica e dos cabos. Isso garante confiabilidade e segurança a longo prazo.
Você deve se proteger antes de começar a trabalhar com qualquer equipamento elétrico. Usar o equipamento de proteção individual correto o mantém seguro contra choques elétricos e outros perigos. Aqui está uma lista de EPIs essenciais para a instalação de uma caixa combinadora fotovoltaica:
Sempre inspecione seu EPI quanto a danos antes de cada uso. Substitua qualquer equipamento desgastado ou com defeito para manter a segurança máxima.
Verifique cuidadosamente o local de instalação. Certifique-se de que a área esteja seca e livre de bagunça. Você deve confirmar se a superfície de montagem é forte o suficiente para segurar a caixa combinadora fotovoltaica. Use um voltímetro para verificar se todos os fios têm a mesma tensão. Essa etapa evita conexões incompatíveis e reduz o risco de falhas elétricas.
Você precisa seguir estas etapas para a verificação adequada do local e da tensão:
Dica: nunca toque em fios expostos com as mãos desprotegidas. Sempre use ferramentas isoladas e use seu EPI.
Você deve seguir os padrões internacionais e nacionais ao instalar um Caixa combinadora fotovoltaica. Esses padrões ajudam a garantir a segurança e a confiabilidade do seu sistema solar. Os padrões mais comuns incluem IEC, UL, NEC, CE e CCC. Você pode ler mais sobre Normas IEC (dofollow) e Padrões UL (nofollow) para instalações elétricas.
Aqui está uma tabela que mostra padrões de conformidade importantes por região:
| Tipo padrão | Região |
|---|---|
| Normas IEC | Europa/global |
| Padrões UL | América do Norte |
| Código NEC | EUA |
| Marcação CE | União Europeia |
| Certificação CCC | China |
Você também deve prestar atenção aos artigos específicos do National Electrical Code (NEC) relacionados a instalações solares:
Seguir esses padrões e artigos ajuda você a manter segurança e conformidade em toda a sua instalação. Você reduz o risco de incêndios elétricos, falhas no sistema e problemas legais.
Observação: Sempre verifique a versão mais recente de cada padrão antes de iniciar a instalação. Os padrões podem mudar com o tempo, portanto, manter-se atualizado é importante para a segurança.
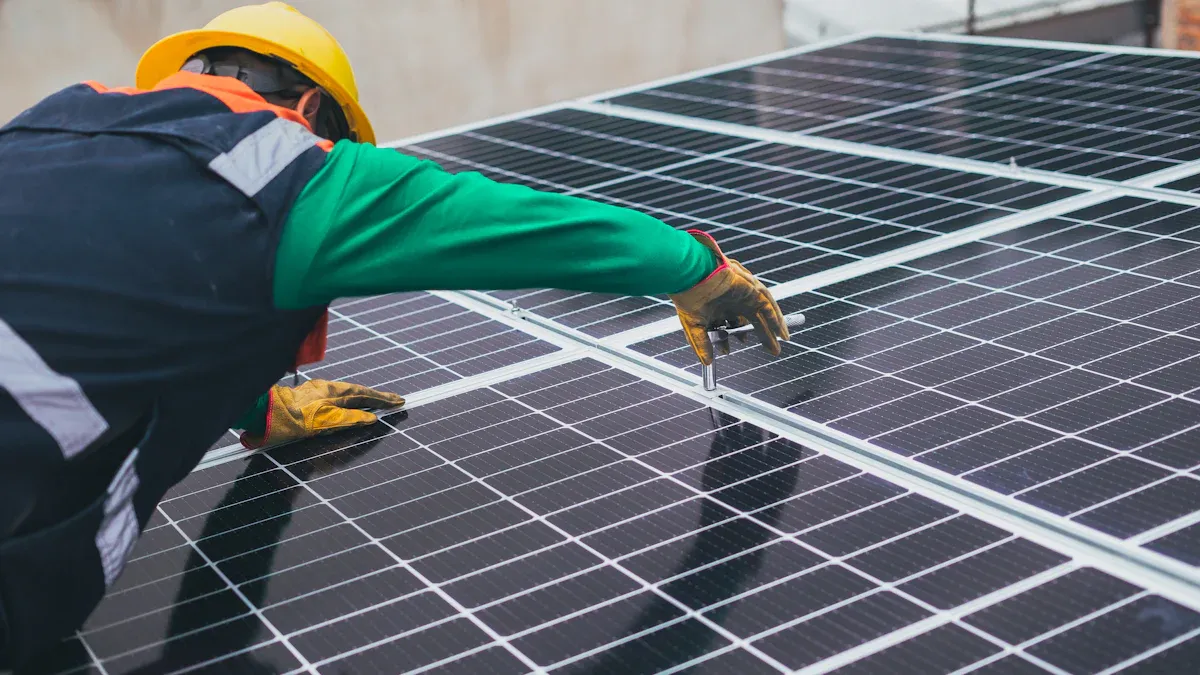
Você precisa escolher o local certo para sua caixa combinadora fotovoltaica para manter seu sistema solar seguro e eficiente. Coloque a caixa perto de seus painéis solares, mas longe da luz solar direta e de chuva forte. Isso reduz o risco de superaquecimento e danos causados pela água. Selecione um local que permita fácil acesso para manutenção e inspeção. Você deve montar a caixa combinadora solar em uma altura que lhe permita alcançá-la sem usar uma escada. Isso aumenta a segurança durante as verificações de rotina.
Dica: Evite montar a caixa perto de áreas com tráfego frequente de pedestres ou onde ela possa ser atingida por objetos. Isso ajuda a evitar danos acidentais.
Depois de escolher o local, marque os pontos para perfuração. Use um nível para ter certeza de que a caixa combinadora fotovoltaica ficará reta. Faça furos que correspondam aos suportes de montagem ou furos na parte traseira da caixa. Insira buchas de parede se for montar a caixa em concreto ou tijolo. Fixe a caixa com parafusos de aço inoxidável para evitar ferrugem e garantir uma fixação firme. Aperte cada parafuso uniformemente para evitar deformar a caixa.
Uma instalação estável mantém seu sistema seguro e reduz o risco de falhas elétricas. Você pode consultar a tipos de caixa combinadora solar diagrama de fiação fornecido pela kuangya electrical para orientação sobre a montagem adequada e o layout da fiação.
As instalações solares externas enfrentam condições climáticas adversas. Você deve proteger sua caixa combinadora solar contra poeira, chuva e sol. Procure caixas com classificação IP65 ou superior. Essa classificação significa que a caixa resiste à poeira e à água, mantendo seu sistema seguro em todas as estações. Escolha produtos que atendam a UL 1741 para a América do Norte ou IEC 61439 para mercados internacionais. Essas certificações mostram que a caixa atende a padrões rígidos de segurança e desempenho.
Observação: Você pode saber mais sobre IEC 61439 (dofollow) e UL 1741 (nofollow) para equipamentos elétricos.
Vede todos os pontos de entrada de cabos com prensa-cabos à prova de intempéries. Essa etapa impede que a umidade e a poeira entrem na caixa. Verifique as gaxetas e as vedações ao redor da porta ou da tampa. Substitua todas as peças desgastadas para manter a caixa à prova de intempéries. Inspecione regularmente a caixa quanto a rachaduras ou sinais de desgaste.
Uma caixa combinadora fotovoltaica bem protegida prolonga a vida útil de seu sistema solar e mantém sua segurança como prioridade máxima.
Você precisa conectar seus painéis solares à caixa combinadora solar usando Conectores MC4. Esses conectores proporcionam uma conexão elétrica confiável e ajudam a manter a segurança em sua instalação solar. Os conectores MC4 funcionam bem tanto para a fiação em série quanto para a fiação paralela. Para uma conexão em série, você une o terminal positivo de um painel solar ao terminal negativo do próximo. Essa configuração aumenta a saída de tensão. Em uma conexão paralela, você conecta todos os terminais positivos juntos e todos os terminais negativos juntos. Esse método aumenta a saída de corrente.
Dica: Verifique novamente cada conexão antes de passar para a próxima etapa. A fiação adequada ajuda a evitar falhas e mantém o sistema solar funcionando sem problemas.
Você deve conectar os terminais positivo e negativo corretamente para evitar falhas elétricas. Comece certificando-se de que o sistema solar esteja desenergizado. Passe os fios positivo e negativo de cada string solar pelos prensa-cabos da caixa combinadora solar. Conecte o fio positivo de cada string a um porta-fusível ou disjuntor. Aperte cada conexão de acordo com as especificações de torque do fabricante. Conecte os fios negativos a um barramento negativo comum ou a um bloco de terminais.
Observação: Sempre faça uma inspeção visual antes de vedar a caixa combinadora solar. Conexões soltas podem causar superaquecimento e reduzir a segurança.
Cada string solar precisa de proteção contra sobrecorrente. Você deve instalar fusíveis ou disjuntores classificados para 600 V e até 15 A por string. Esses dispositivos protegem sua caixa combinadora solar contra danos causados por surtos ou falhas elétricas. Coloque cada suporte de fusível alinhado com o fio positivo de cada string solar. Certifique-se de que o fusível se encaixe com segurança e corresponda às especificações de sua instalação solar.
| Tipo de fusível | Classificação da tensão | Classificação atual | Aplicativo |
|---|---|---|---|
| Fusível fotovoltaico | 600V | Até 15A | Caixa combinadora solar |
| Disjuntor | 600V | Até 15A | Caixa combinadora solar |
Você pode saber mais sobre as normas IEC (dofollow) para classificações de fusíveis e as normas UL (nofollow) para segurança elétrica.
A instalação correta do fusível ajuda a evitar incêndios elétricos e mantém seu sistema solar seguro. Verifique regularmente os fusíveis durante a manutenção para garantir que a caixa combinadora solar funcione de forma eficiente.
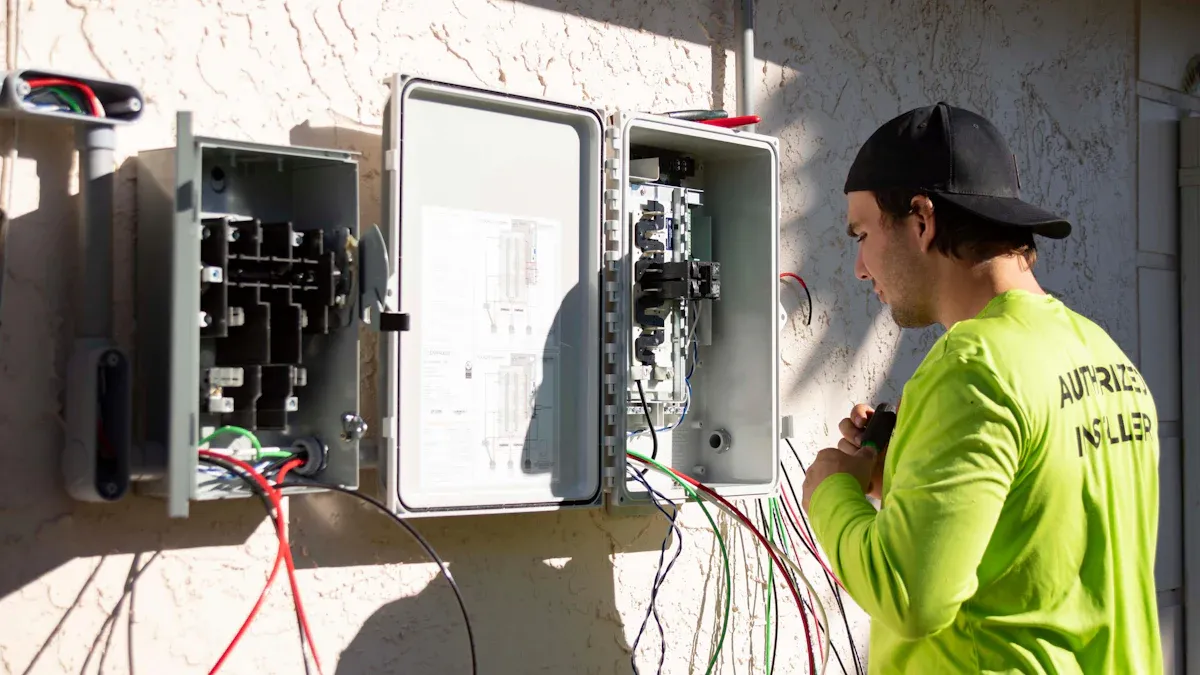
Você precisa conectar a saída de seu caixa combinadora solar para o inversor. Essa etapa permite que a energia combinada de todas as cadeias de painéis solares flua para o inversor, onde é convertida de CC para CA. Use cabos classificados para a tensão e a corrente de seu painel solar. Certifique-se de que os terminais de saída na caixa combinadora solar estejam claramente identificados. Passe o cabo de saída por um prensa-cabo à prova de intempéries para evitar a entrada de umidade na caixa.
Dica: Siga sempre o diagrama de fiação do fabricante do inversor para obter os melhores resultados e manter a segurança.
O aterramento adequado é essencial para toda instalação solar. O aterramento protege você e seu equipamento contra falhas elétricas e quedas de raios. Você deve seguir os códigos elétricos ao aterrar sua caixa combinadora solar.
Você também deve aterrar todos os equipamentos para limitar a tensão de raios e surtos. Conecte um barramento de aterramento ao chassi metálico da caixa combinadora solar. Use conectores mecânicos aprovados e arruelas de ligação para ligar e aterrar todos os componentes.
Observação: Inspecione todas as conexões de aterramento regularmente. Substitua todas as peças corroídas ou soltas para manter seu sistema solar seguro. Para obter mais detalhes, você pode consultar IEC 60364 (dofollow) para padrões de aterramento.
Proteção contra surtos mantém sua caixa combinadora solar e o restante do seu sistema solar protegidos contra picos de tensão. Instale dispositivos de proteção contra surtos (SPDs) o mais próximo possível dos painéis solares, geralmente dentro da caixa combinadora de CC. Essa configuração ajuda a evitar que eventos de sobretensão danifiquem várias cadeias de painéis solares ao mesmo tempo.
Os SPDs tipo 2 funcionam bem entre os painéis solares e o inversor. Esses dispositivos interceptam picos de tensão perigosos e protegem seu equipamento. Para maior segurança, instale os SPDs perto dos painéis solares e na entrada do inversor.
| Dispositivo de proteção contra surtos | Localização | Função |
|---|---|---|
| SPD Tipo 2 | Caixa combinadora, inversor | Intercepta picos de tensão e protege o sistema |
Sempre verifique se os SPDs correspondem às classificações de tensão e corrente da caixa combinadora solar. Substitua imediatamente qualquer SPD danificado para manter a proteção.
Antes de ligar a caixa combinadora solar, é necessário inspecionar todas as conexões quanto à confiabilidade e segurança. Siga estas etapas para ter certeza de que sua instalação está correta:
Dica: não tenha pressa durante esse processo. Uma inspeção cuidadosa ajuda a evitar falhas elétricas e mantém sua instalação solar segura.
Após terminar de verificar todas as conexões, você pode ligar o sistema solar. Comece fechando a tampa da caixa combinadora solar e prendendo todas as travas. Ligue o disjuntor principal ou o fusível dentro da caixa. Observe se há algum som ou cheiro incomum. Se notar algo estranho, desligue a energia imediatamente e inspecione a caixa novamente.
Você deverá ver luzes indicadoras na caixa combinadora solar e no inversor. Essas luzes mostram que o sistema está funcionando. Se a sua caixa tiver um visor digital, verifique as leituras de tensão e corrente. Elas devem corresponder aos valores esperados para seu painel solar.
Observação: Sempre mantenha as mãos secas e use luvas isolantes ao ligar equipamentos elétricos. Essa simples medida aumenta a segurança.
Quando o sistema solar estiver em funcionamento, você precisará verificar se tudo está funcionando corretamente. Use o software de monitoramento do computador host para verificar o endereço da caixa combinadora solar. Certifique-se de que a taxa de transmissão corresponda às configurações de comunicação no programa de monitoramento. Confirme se a resistência de terminação 120 está conectada ao terminal correto do barramento de comunicação.
Você pode encontrar mais detalhes sobre segurança elétrica e verificação do sistema em IEC 60364 (dofollow) e Padrões UL (nofollow).
Se você notar algum erro ou aviso, resolva-o imediatamente. As verificações regulares do sistema o ajudam a manter uma instalação solar segura e eficiente. 😊
É necessário inspecionar a caixa combinadora solar regularmente para manter o sistema solar seguro e eficiente. As verificações de rotina ajudam a detectar problemas com antecedência e a evitar reparos dispendiosos. Você deve fazer uma inspeção visual a cada seis meses. Procure por poeira, insetos e sinais de corrosão. Use uma ferramenta de torque para testar os terminais dos cabos, conforme necessário. A geração de imagens térmicas ajuda a identificar pontos quentes que podem indicar problemas. Substitua fusíveis e dispositivos de proteção contra surtos a cada dois ou três anos. Se você usar uma caixa combinadora inteligente, atualize o software quando necessário.
| Etapa de inspeção | Frequência |
|---|---|
| Inspeção visual quanto a poeira, insetos, etc. | A cada 6 meses |
| Teste de torque nos terminais dos cabos | Conforme necessário |
| Imagem térmica para hotspots | Conforme necessário |
| Substituição de fusíveis e SPDs | A cada 2 ou 3 anos |
| Atualizações de software para caixas combinadoras inteligentes | Conforme necessário |
Verifique também se há flexibilidade e rachaduras nas vedações das portas. Certifique-se de que as tampas do compartimento estejam travadas com segurança. Verifique a proteção contra umidade da caixa combinadora IP65. Procure por manchas de água, condensação e acúmulo de poeira. Confirme se as etiquetas de segurança e os identificadores de circuito estão legíveis. Planeje inspeções anuais com um desligamento do sistema. Use ferramentas de torque calibradas, realize testes de resistência de isolamento e opere manualmente as desconexões e os disjuntores para garantir que tudo esteja funcionando.
Dica: As inspeções visuais trimestrais ajudam a detectar problemas óbvios com antecedência. As inspeções anuais abrangentes identificam problemas ocultos.
É necessário manter a caixa combinadora solar limpa para manter o desempenho. A poeira e os detritos podem bloquear a ventilação e causar superaquecimento. Use rolos de cerdas macias ou raspadores de silicone com água deionizada. Controle a pressão da água entre 30 e 40 bar para evitar danos. Para áreas altas, use equipamento de limpeza telescópico ou contrate profissionais. Nunca use produtos de limpeza à base de cloro, solventes à base de álcool ou ferramentas de metal. Esses produtos podem danificar a caixa e reduzir a segurança.
| Método de limpeza | Descrição |
|---|---|
| Limpeza regular | Remova periodicamente a poeira e os detritos para evitar problemas de desempenho. |
| Verificação da ventilação | Certifique-se de que as portas de ventilação estejam desobstruídas para uma dissipação eficaz do calor. |
Dica profissional: Sempre limpe seus painéis no início da manhã ou no final da noite, quando estiverem frios. A aplicação de água fria em painéis quentes pode causar choque térmico e potencialmente rachar o vidro.
Você pode encontrar vários problemas comuns com sua caixa combinadora solar. Conexões soltas ou defeituosas podem causar superaquecimento ou falha do sistema. Aperte todos os blocos de terminais e reaperte as conexões durante cada inspeção. Substitua todos os terminais oxidados ou queimados. Os fusíveis queimados precisam ser substituídos pelo tipo e classificação corretos. Se um fusível queimar repetidamente, verifique se há um curto-circuito ou uma falha no módulo solar. A falha do disjuntor exige a substituição dos disjuntores defeituosos e a confirmação de que a caixa corresponde à corrente e à tensão nominal do sistema.
Os dispositivos de proteção contra raios podem falhar após um surto. Substitua os dispositivos de proteção contra surtos imediatamente e verifique se a resistência do aterramento está dentro dos limites. O superaquecimento geralmente resulta de ventilação bloqueada. Certifique-se de que a ventilação seja adequada e considere o uso de gabinetes metálicos para melhor dissipação de calor. A entrada de poeira e água pode danificar sua caixa combinadora solar. Limpe a caixa regularmente e feche novamente as juntas quebradas. Podem ocorrer erros de monitoramento e comunicação. Verifique se a taxa de transmissão, o endereço de comunicação e os resistores de terminação estão definidos corretamente.
| Problemas comuns | Etapas de solução de problemas |
|---|---|
| Conexões soltas ou com defeito | Aperte todos os blocos de terminais e reaperte as conexões. Substitua os terminais oxidados ou queimados. |
| Fusíveis queimados | Substitua pelo tipo e classificação corretos. Investigue as falhas repetidas em busca de curtos-circuitos ou falhas no módulo. |
| Falha do disjuntor | Substitua os disjuntores com defeito. Confirme se a caixa corresponde à corrente e à tensão nominal do sistema. |
| Falha na proteção contra raios | Substitua os dispositivos SPD. Verifique a resistência do aterramento. |
| Superaquecimento | Garanta a ventilação. Use gabinetes de metal para dissipação de calor. |
| Entrada de poeira e água | Limpe a caixa regularmente. Feche novamente as juntas quebradas. |
| Erros de monitoramento e comunicação | Verifique a taxa de baud, o endereço e os resistores de terminação. |
Você pode encontrar mais detalhes sobre inspeção e manutenção em IEC 60364 (dofollow) e Padrões UL (nofollow).
Ao instalar e manter uma caixa combinadora fotovoltaica da kuangya electrical, você pode precisar de suporte em diferentes estágios. O suporte confiável o ajuda a resolver problemas rapidamente e mantém seu sistema solar funcionando com segurança. Você tem várias opções para obter ajuda quando precisar.
1. Suporte do fabricante
A Kuangya electrical oferece suporte técnico para todas as suas caixas combinadoras fotovoltaicas. Você pode entrar em contato com a equipe de atendimento ao cliente por telefone ou e-mail. Eles respondem a perguntas sobre instalação, solução de problemas e especificações do produto. Você deve ter em mãos o número de série do produto e os detalhes da compra quando entrar em contato. Isso ajuda a equipe de suporte a ajudá-lo mais rapidamente.
2. Assistência profissional
Às vezes, você enfrenta problemas que exigem ajuda especializada. Eletricistas licenciados e técnicos em energia solar têm o treinamento necessário para resolver problemas complexos. Você deve chamar um profissional se perceber falhas elétricas, falhas repetidas de fusíveis ou sinais de superaquecimento. Os profissionais usam ferramentas especializadas para diagnosticar e reparar seu sistema com segurança.
3. Recursos on-line
Você pode encontrar muitos guias e vídeos on-line que explicam como fazer a manutenção e solucionar problemas das caixas combinadoras fotovoltaicas. A Kuangya electrical fornece manuais e perguntas frequentes em seu site. Você também pode visitar sites educacionais como Página de normas IEC da Wikipedia (dofollow) para saber mais sobre segurança elétrica e conformidade. Para obter etapas específicas de solução de problemas, você pode consultar os fóruns de fabricantes e as comunidades de energia solar. Esses recursos geralmente incluem dicas de outros usuários.
4. Fóruns da comunidade
Os fóruns de energia solar e os grupos de mídia social oferecem um local para fazer perguntas e compartilhar experiências. Você pode publicar seu problema e receber conselhos de outros proprietários de sistemas solares. Muitos usuários compartilham soluções para problemas comuns, como fusíveis queimados ou erros de monitoramento. Sempre verifique as orientações com fontes oficiais antes de fazer alterações em seu sistema.
| Opção de suporte | Como acessar | Melhor para |
|---|---|---|
| Suporte do fabricante | Telefone, e-mail, site | Problemas específicos do produto |
| Ajuda profissional | Eletricista/Técnico licenciado | Problemas elétricos complexos |
| Recursos on-line | Manuais, guias, Wikipedia | Solução de problemas gerais |
| Fóruns da comunidade | Fóruns solares, mídia social | Conselhos e experiências de colegas |
Dica: Sempre documente suas etapas de manutenção e solução de problemas. Esse registro ajuda a explicar o problema quando você entra em contato com o suporte e facilita futuros reparos.
Se precisar de mais informações sobre os padrões elétricos, você pode visitar Normas IEC (dofollow) ou Padrões UL (nofollow). Esses sites fornecem detalhes sobre os requisitos de segurança para instalações solares.
Ao usar os recursos de suporte com sabedoria, você mantém seu sistema solar seguro e eficiente. 😊
Você pode instalar uma caixa combinadora fotovoltaica da kuangya electrical seguindo estas etapas fundamentais:
A manutenção regular e a fiação correta mantêm sua instalação solar segura e eficiente. As caixas combinadoras protegem seu sistema e otimizam a distribuição de energia. Se precisar de ajuda, consulte profissionais certificados. Os produtos elétricos da Kuangya são altamente satisfatórios para os clientes. Você pode concluir seu projeto solar com confiança.
| Nome da certificação | Descrição |
|---|---|
| Profissional de instalação fotovoltaica (PVIP) | Valida a competência em design, instalação e manutenção. |
| Especialista em projetos fotovoltaicos (PVDS) | Reconhece habilidades avançadas de projeto para sistemas solares. |
| Especialista em instalação fotovoltaica (PVIS) | Concentra-se em planos de instalação e segurança. |
| Especialista em manutenção e comissionamento fotovoltaico (PVCMS) | Destaca a experiência em operações e manutenção. |
Saiba mais sobre Normas IEC (dofollow) e Padrões UL (nofollow) para segurança solar.
Você seleciona uma caixa combinadora fotovoltaica com base no número de strings de painéis solares e em sua tensão. Verifique as especificações do fabricante. A Kuangya electrical fornece tabelas de dimensionamento para facilitar a seleção.
Inspecione sua caixa combinadora fotovoltaica a cada seis meses. Limpe a poeira e os detritos regularmente. Substitua os fusíveis e dispositivos de proteção contra surtos a cada dois ou três anos. Acompanhe Normas IEC (dofollow) para práticas recomendadas.
Sim, você pode instalar uma caixa combinadora fotovoltaica em ambientes externos. Escolha uma caixa com classificação IP65 ou superior. Os prensa-cabos e as vedações à prova de intempéries protegem contra umidade e poeira.
Substitua o fusível com a classificação correta. Se o problema persistir, verifique se há curtos-circuitos ou módulos solares defeituosos. Consulte um eletricista licenciado para solucionar mais problemas.
Você deve instalar dispositivos de proteção contra surtos em cada caixa combinadora fotovoltaica. Esses dispositivos protegem seu sistema contra picos de tensão. Os SPDs tipo 2 funcionam bem para a maioria das instalações solares.
Utilize um testador de continuidade para verificar as conexões de aterramento. Verifique se há corrosão e fios soltos. Siga Padrões UL (nofollow) para os requisitos de aterramento.
Você pode conectar marcas diferentes se suas classificações de tensão e corrente forem compatíveis. Sempre verifique a compatibilidade com as especificações da caixa combinadora. Use conectores MC4 para conexões seguras e confiáveis.
Você visita Normas IEC (dofollow) para obter diretrizes globais. Para a América do Norte, consulte Padrões UL (nofollow). Os manuais do fabricante também fornecem instruções detalhadas.
