How to Install a PV Combiner Box in Your Solar System with kuangya electrical

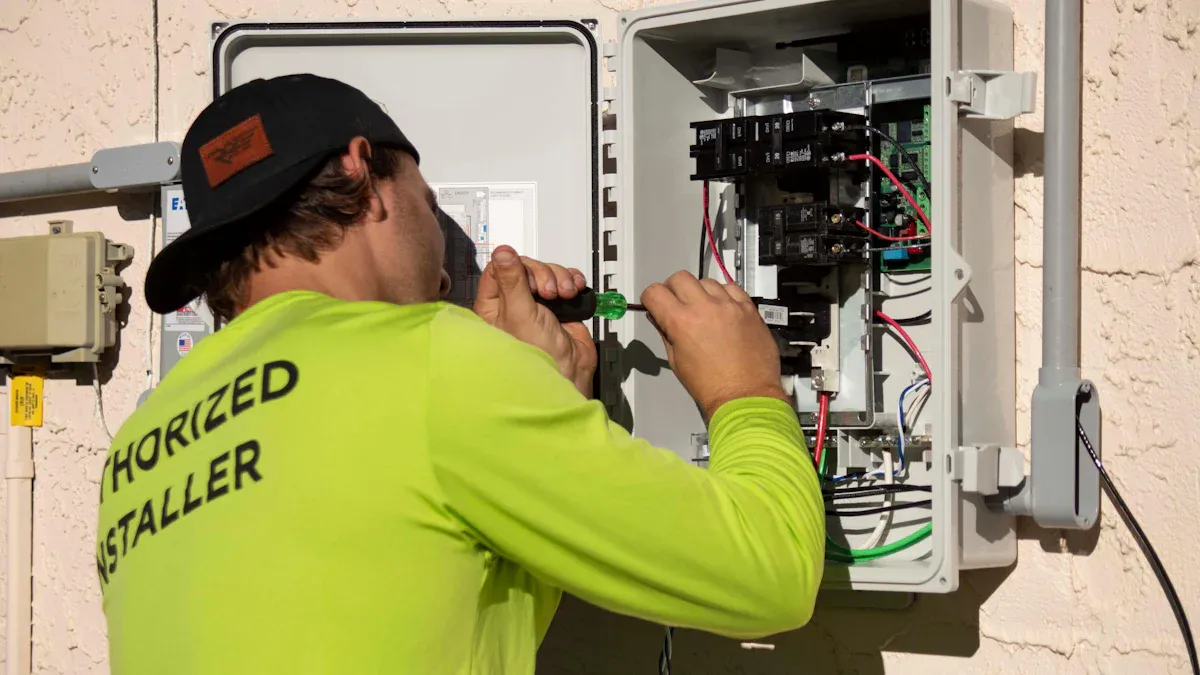
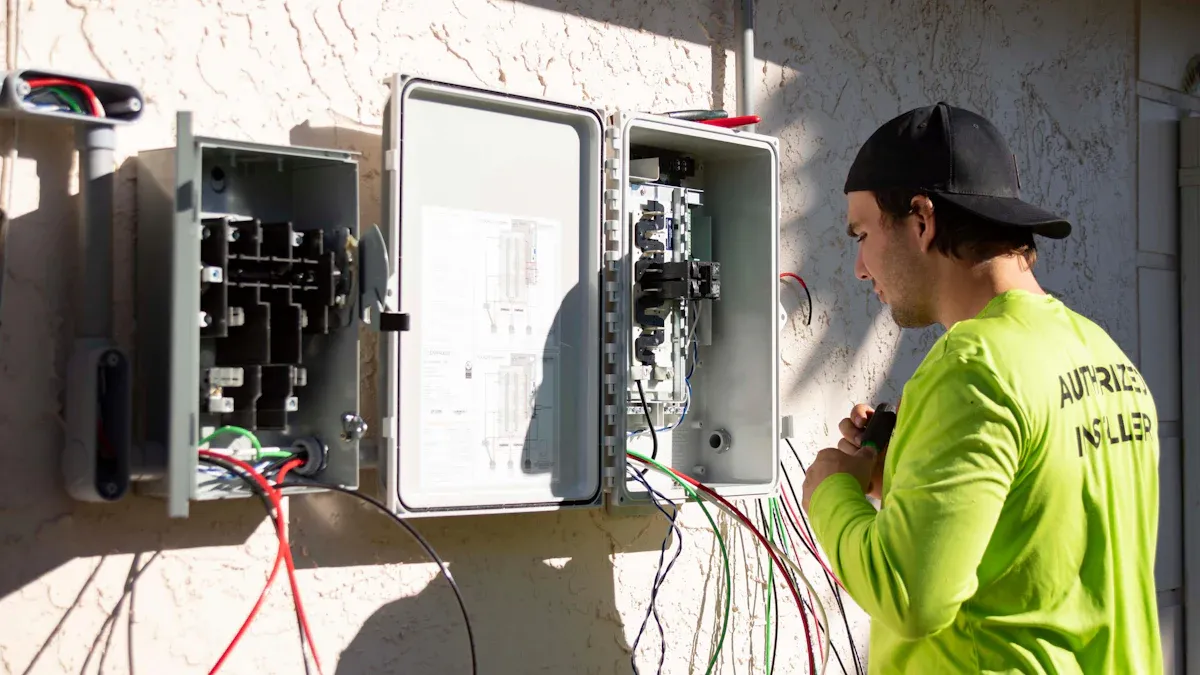
You can install a pv combiner box from kuangya electrical by following a detailed installation guide and prioritizing safety at every step. The pv combiner box manages solar panel outputs in your system, helping prevent overcurrent faults, overheating, and moisture-related issues. Always use the correct tools, check for consistent voltage, and wear proper protective gear. Review all steps in the installation guide before starting. Choose kuangya electrical products for reliability and compliance with IEC standards.

주요 내용

  • Gather all necessary tools and parts before starting the installation. This ensures efficiency and safety during the process.
  • Always wear personal protective equipment (PPE) like insulated gloves and safety goggles to protect yourself from electrical hazards.
  • Choose a suitable mounting location for the PV combiner box, away from direct sunlight and moisture, to enhance safety and efficiency.
  • 사용 MC4 connectors for secure and reliable connections between solar panels and the combiner box, ensuring proper polarity.
  • Install fuses or circuit breakers rated for your system to protect against overcurrent and electrical faults.
  • Regularly inspect and maintain your PV combiner box to catch issues early and ensure long-term performance.
  • Follow international and national compliance standards during installation to ensure safety and reliability in your solar system.
  • Seek support from manufacturer resources or professionals if you encounter complex issues during installation or maintenance.

Tools and Parts

Before you begin installing your PV combiner box from kuangya electrical, gather all the necessary installation tools and components. Having everything ready helps you work efficiently and safely.

Essential Tools

You need several tools to complete the installation. Here is a checklist to guide you:

  1. Electrical screwdriver (tester)
  2. Box for installation
  3. Provided screws for attaching the combiner box to a wall
  4. Flat-head screwdriver
  5. Drilling machine and bits suitable for a wall or pole
  6. Wire cutters
  7. Wire strippers
  8. Clamp-on DC current meter
  9. Voltmeter

If your system includes Ethernet monitoring, prepare these items:

  1. RJ45 connectors
  2. CAT5 twisted-pair Ethernet cable
  3. RJ45 crimping tool

Tip: Always check that your installation tools are in good condition before starting. This reduces the risk of accidents and ensures a smooth installation process.

PV Combiner Box Components

A PV combiner box from kuangya electrical contains several key parts. You will find input terminals for each solar panel string, output terminals for the inverter connection, fuses or circuit breakers, and surge protection devices. The box also includes grounding points to protect your system from electrical faults.

MC4 connectors play a vital role in connecting solar panel cables to the combiner box. Ordinary MC4 cables work well for residential setups, while specialized cables suit larger commercial installations. Quality cables improve performance and safety in your solar energy system.

Here is a table showing typical MC4 connector specifications:

사양Value
제조업체Multi-Contact USA
Maximum Current Rating30 amps
Maximum Voltage Rating1,000 volts
Temperature Range-40°C to +90°C (-40°F to 194°F)

You can learn more about IEC standards (dofollow) for electrical safety and compliance.

Optional Accessories

You may want to add accessories to improve your installation. Weatherproof cable glands protect connections from moisture. Labeling tags help you identify wires quickly during maintenance. Some installers use cable ties to keep wiring neat and organized.

Note: Choose accessories that match the specifications of your PV combiner box and cables. This ensures long-term reliability and safety.

Safety and Checks

Personal Protective Equipment

You must protect yourself before you start working with any electrical equipment. Wearing the right personal protective equipment keeps you safe from electrical shocks and other hazards. Here is a list of essential PPE for installing a PV combiner box:

  • Insulated gloves
  • Safety goggles
  • Flame-resistant clothing
  • Hard hat
  • Non-slip safety shoes

Always inspect your PPE for damage before each use. Replace any worn or faulty gear to maintain maximum safety.

Site and Voltage Verification

Check your installation site carefully. Make sure the area is dry and free from clutter. You should confirm that the mounting surface is strong enough to hold the PV combiner box. Use a voltmeter to verify that all wires carry the same voltage. This step prevents mismatched connections and reduces the risk of electrical faults.

You need to follow these steps for proper site and voltage verification:

  1. Inspect the mounting location for moisture and debris.
  2. Confirm that the surface is level and secure.
  3. Use a voltmeter to check voltage consistency across all wires.
  4. Label each wire for easy identification during installation.

Tip: Never touch exposed wires with bare hands. Always use insulated tools and wear your PPE.

규정 준수 표준

You must follow international and national standards when installing a PV 컴바이너 박스. These standards help ensure safety and reliability in your solar system. The most common standards include IEC, UL, NEC, CE, and CCC. You can read more about IEC standards (dofollow) and UL standards (nofollow) for electrical installations.

Here is a table showing important compliance standards by region:

Standard TypeRegion
IEC StandardsEurope/global
UL 표준North America
NEC Code미국
CE 마크European Union
CCC CertificationChina

You should also pay attention to specific articles in the National Electrical Code (NEC) that relate to solar installations:

  • Article 690: Solar Photovoltaic Systems
  • Article 110: Requirements for Electrical Installations
  • Article 230: Services
  • Article 240: Overcurrent Protection
  • Article 250: Grounding and Bonding
  • Article 300: Wiring Methods
  • Article 310: Conductors for General Wiring
  • Article 450: Transformers
  • Article 480: Storage Batteries
  • Article 705: Interconnected Electric Power Production Sources

Following these standards and articles helps you maintain safety and compliance throughout your installation. You reduce the risk of electrical fires, system failures, and legal issues.

Note: Always check the latest version of each standard before starting your installation. Standards may change over time, so staying updated is important for safety.

PV Combiner Box Setup

PV Combiner Box Setup

Mounting Location

You need to choose the right spot for your pv combiner box to keep your solar system safe and efficient. Place the box close to your solar panels but away from direct sunlight and heavy rain. This reduces the risk of overheating and water damage. Select a location that allows easy access for maintenance and inspection. You should mount the solar combiner box at a height that lets you reach it without using a ladder. This improves safety during routine checks.

Tip: Avoid mounting the box near areas with frequent foot traffic or where it could get hit by objects. This helps prevent accidental damage.

Drilling and Securing

Once you pick the location, mark the spots for drilling. Use a level to make sure the pv combiner box will sit straight. Drill holes that match the mounting brackets or holes on the back of the box. Insert wall plugs if you mount the box on concrete or brick. Secure the box with stainless steel screws to prevent rust and ensure a firm hold. Tighten each screw evenly to avoid warping the box.

  • Always double-check that the box does not move after installation.
  • Use a torque screwdriver if your solar combiner box requires specific torque settings for mounting.

A stable installation keeps your system safe and reduces the risk of electrical faults. You can refer to the types of solar combiner box wiring diagram provided by kuangya electrical for guidance on proper mounting and wiring layout.

Weatherproofing

Outdoor solar installations face harsh weather. You must protect your solar combiner box from dust, rain, and sun. Look for boxes with an IP65 or higher rating. This rating means the box resists dust and water, keeping your system safe in all seasons. Choose products that meet UL 1741 for North America or IEC 61439 for international markets. These certifications show that the box meets strict safety and performance standards.

  • IP65 or higher rating ensures dust-tight and water-resistant protection.
  • UL 1741 and IEC 61439 certifications confirm compliance with global safety standards.

Note: You can learn more about IEC 61439 (dofollow) and UL 1741 (nofollow) standards for electrical equipment.

Seal all cable entry points with weatherproof cable glands. This step blocks moisture and dust from entering the box. Check the gaskets and seals around the door or cover. Replace any worn parts to keep the box weatherproof. Regularly inspect the box for cracks or signs of wear.

A well-protected pv combiner box extends the life of your solar system and keeps your safety a top priority.

Solar Panel Wiring

Solar Panel Wiring

Connecting with MC4 Connectors

You need to connect your solar panels to the solar combiner box using MC4 connectors. These connectors give you a reliable electrical connection and help maintain safety in your solar installation. MC4 connectors work well for both series and parallel wiring. For a series connection, you join the positive terminal of one solar panel to the negative terminal of the next. This setup increases the voltage output. For a parallel connection, you connect all positive terminals together and all negative terminals together. This method boosts the current output.

  • Use MC4 connectors for secure and weather-resistant connections.
  • Measure cable lengths carefully before cutting.
  • Terminate cable ends properly at the bus bars or circuit breakers inside the solar combiner box.
  • MC4 multi-branch connectors work for small solar systems. For larger setups, always use a pv combiner box.

Tip: Double-check each connection before moving to the next step. Proper wiring helps prevent faults and keeps your solar system running smoothly.

Positive and Negative Terminals

You must wire the positive and negative terminals correctly to avoid electrical faults. Start by making sure the solar system is de-energized. Run the positive and negative wires from each solar string through the cable glands on the solar combiner box. Connect the positive lead of each string to a fuse holder or circuit breaker. Tighten each connection to the manufacturer’s torque specifications. Attach the negative leads to a common negative busbar or terminal block.

  1. De-energize the solar system before starting.
  2. Route positive and negative wires through cable glands.
  3. Secure the positive lead to the fuse holder or circuit breaker.
  4. Attach the negative lead to the negative busbar.
  5. Inspect all connections for tightness and correct polarity.

Note: Always perform a visual inspection before sealing the solar combiner box. Loose connections can cause overheating and reduce safety.

Fuse Installation

Each solar string needs overcurrent protection. You should install fuses or circuit breakers rated for 600V and up to 15A per string. These devices protect your solar combiner box from damage caused by electrical surges or faults. Place each fuse holder in line with the positive wire from each solar string. Make sure the fuse fits securely and matches the specifications for your solar installation.

  • Use fuse holders rated for 600V and up to 15A.
  • Check that each fuse matches the current rating of your solar panels.
  • Replace any blown fuses immediately to maintain system safety.
Fuse TypeVoltage Rating전류 등급애플리케이션
PV Fuse600VUp to 15ASolar combiner box
Circuit Breaker600VUp to 15ASolar combiner box

You can learn more about IEC standards (dofollow) for fuse ratings and UL standards (nofollow) for electrical safety.

Correct fuse installation helps prevent electrical fires and keeps your solar system safe. Regularly check the fuses during maintenance to ensure your solar combiner box works efficiently.

Solar Combiner Box Connections

Output to Inverter

You need to connect the output of your solar combiner box to the inverter. This step allows the combined power from all your solar panel strings to flow into the inverter, where it gets converted from DC to AC. Use cables rated for the voltage and current of your solar array. Make sure the output terminals in the solar combiner box are clearly labeled. Route the output cable through a weatherproof gland to prevent moisture from entering the box.

  • Double-check the polarity of the output wires before connecting them to the inverter.
  • Secure all connections tightly to avoid overheating.
  • Use cable ties to keep the wiring neat and reduce the risk of accidental damage.

Tip: Always follow the inverter manufacturer’s wiring diagram for the best results and to maintain safety.

Grounding

Proper grounding is essential for every solar installation. Grounding protects you and your equipment from electrical faults and lightning strikes. You must follow electrical codes when grounding your solar combiner box.

  • Isolated PV arrays require ground-fault protection devices (GFPD) to ensure safety.
  • Ungrounded PV arrays also need GFPD to detect ground faults.
  • Solidly grounded PV arrays must connect one DC conductor to a grounding electrode system.

You should also ground all equipment to limit voltage from lightning and surges. Connect a grounding busbar to the metal chassis of your solar combiner box. Use approved mechanical connectors and bonding washers to bond and ground all components.

  • Exposure to weather can cause failures in grounding.
  • Thermal cycling may loosen connections over time.
  • Corrosion can happen if you use dissimilar metals together.

Note: Inspect all grounding connections regularly. Replace any corroded or loose parts to keep your solar system safe. For more details, you can review IEC 60364 (dofollow) for grounding standards.

Surge Protection

Surge protection keeps your solar combiner box and the rest of your solar system safe from voltage spikes. Install surge protection devices (SPDs) as close to the solar panels as possible, usually inside the DC combiner box. This setup helps prevent overvoltage events from damaging multiple solar panel strings at once.

Type 2 SPDs work well between the solar panels and the inverter. These devices intercept dangerous voltage spikes and protect your equipment. For the best safety, install SPDs both near the solar panels and at the inverter input.

Surge Protection Device위치기능
유형 2 SPDCombiner box, inverterIntercepts voltage spikes, protects system

Always check that your SPDs match the voltage and current ratings of your solar combiner box. Replace any damaged SPDs right away to maintain protection.

Testing and Start-Up

Double-Check Connections

Before you power on your solar combiner box, you need to inspect every connection for reliability and safety. Follow these steps to make sure your installation is correct:

  1. Inspect physical connections. Check that all wires are securely attached and look for any damage.
  2. Verify polarity and voltage. Use a multimeter to confirm that each wire is connected correctly.
  3. Test the surge protection device. Simulate a voltage surge to see if the device responds as expected.
  4. Check grounding. Use a continuity tester to confirm that all grounding connections are solid.
  5. Monitor output. Connect the output to the inverter and check voltage and current readings.

Tip: Take your time during this process. Careful inspection helps prevent electrical faults and keeps your solar installation safe.

Power On

After you finish checking all connections, you can power on your solar system. Start by closing the solar combiner box cover and securing all latches. Switch on the main circuit breaker or fuse inside the box. Watch for any unusual sounds or smells. If you notice anything strange, turn off the power immediately and inspect the box again.

You should see indicator lights on the solar combiner box and inverter. These lights show that the system is working. If your box has a digital display, check the voltage and current readings. They should match the expected values for your solar array.

Note: Always keep your hands dry and wear insulated gloves when powering on electrical equipment. This simple step improves safety.

System Verification

Once your solar system is running, you need to verify that everything operates correctly. Use the host computer monitoring software to check the address of the solar combiner box. Make sure the baud rate matches the communication settings in the monitoring program. Confirm that the 120 termination resistance is connected to the right communication bus terminal.

  • Check the fuse and PV array. Look at the current sampling display for each channel. If one channel shows a much higher or lower value than the others, inspect that string for problems.
  • Examine the lightning protector’s status feedback wiring. Make sure it is secure and working.
  • Review all monitoring data to confirm that your solar installation is stable.

You can find more details about electrical safety and system verification in IEC 60364 (dofollow) and UL standards (nofollow).

If you notice any errors or warnings, address them right away. Regular system checks help you maintain a safe and efficient solar installation. 😊

Maintenance and Troubleshooting

Routine Inspection

You need to inspect your solar combiner box regularly to keep your solar system safe and efficient. Routine checks help you catch problems early and prevent costly repairs. You should perform a visual inspection every six months. Look for dust, insects, and signs of corrosion. Use a torque tool to test cable terminals as needed. Thermal imaging helps you spot hotspots that could signal trouble. Replace fuses and surge protection devices every two to three years. If you use a smart combiner box, update the software when necessary.

Inspection Step빈도
Visual inspection for dust, insects, etc.Every 6 months
Torque test on cable terminalsAs needed
Thermal imaging for hotspotsAs needed
Replacement of fuses and SPDsEvery 2–3 years
Software updates for smart combiner boxesAs needed

You should also check door seals for flexibility and cracks. Make sure enclosure lids latch securely. Verify moisture protection of the IP65 combiner box. Look for water stains, condensation, and dust accumulation. Confirm that safety labels and circuit identifiers are readable. Plan annual inspections with a system shutdown. Use calibrated torque tools, perform insulation resistance testing, and operate disconnects and breakers manually to ensure everything works.

Tip: Quarterly visual inspections help you catch obvious problems early. Comprehensive annual inspections identify hidden issues.

Cleaning

You need to keep your solar combiner box clean to maintain performance. Dust and debris can block ventilation and cause overheating. Use soft-bristled rollers or silicone scrapers with deionized water. Control water pressure between 30–40 bar to avoid damage. For high areas, use telescoping cleaning equipment or hire professionals. Never use chlorine-based cleaners, alcohol solvents, or metal tools. These can damage the box and reduce safety.

Cleaning Method설명
Regular CleaningPeriodically remove dust and debris to prevent performance issues.
Ventilation CheckEnsure ventilation ports are unobstructed for effective heat dissipation.

Pro Tip: Always clean your panels during the early morning or late evening when they are cool. Applying cold water to hot panels can cause thermal shock, potentially cracking the glass.

Common Issues

You may encounter several common issues with your solar combiner box. Loose or faulty connections can cause overheating or system failure. Tighten all terminal blocks and retorque connections during each inspection. Replace any oxidized or burnt terminals. Blown fuses need replacement with the correct type and rating. If a fuse blows repeatedly, check for a short circuit or a fault in the solar module. Breaker failure requires you to replace faulty breakers and confirm the box matches your system’s rated current and voltage.

Lightning protection devices may fail after a surge. Replace surge protection devices immediately and verify earthing resistance is within limits. Overheating often results from blocked ventilation. Make sure ventilation is adequate and consider using metal enclosures for better heat dissipation. Dust and water ingress can damage your solar combiner box. Clean the box regularly and reseal any broken gaskets. Monitoring and communication errors may occur. Verify the baud rate, communication address, and termination resistors are set correctly.

Common IssuesTroubleshooting Steps
Loose or Faulty ConnectionsTighten all terminal blocks and retorque the connections. Replace oxidized or burnt terminals.
Blown FusesReplace with correct type and rating. Investigate repeated failures for short circuits or module faults.
Breaker FailureReplace faulty breakers. Confirm box matches system’s rated current and voltage.
Lightning Protection FailureReplace SPD devices. Verify earthing resistance.
OverheatingEnsure ventilation. Use metal enclosures for heat dissipation.
Dust and Water IngressClean box regularly. Reseal broken gaskets.
Monitoring & Communication ErrorsCheck baud rate, address, and termination resistors.

You can find more details about inspection and maintenance in IEC 60364 (dofollow) and UL standards (nofollow).

Support

When you install and maintain a PV combiner box from kuangya electrical, you may need support at different stages. Reliable support helps you solve problems quickly and keeps your solar system running safely. You have several options for getting help when you need it.

1. Manufacturer Support

Kuangya electrical offers technical support for all their PV combiner boxes. You can contact their customer service team by phone or email. They answer questions about installation, troubleshooting, and product specifications. You should keep your product serial number and purchase details ready when you reach out. This helps the support team assist you faster.

2. Professional Assistance

Sometimes, you face issues that require expert help. Licensed electricians and solar technicians have the training to fix complex problems. You should call a professional if you notice electrical faults, repeated fuse failures, or signs of overheating. Professionals use specialized tools to diagnose and repair your system safely.

3. Online Resources

You can find many online guides and videos that explain how to maintain and troubleshoot PV combiner boxes. Kuangya electrical provides manuals and FAQs on their website. You can also visit educational sites like Wikipedia’s IEC standards page (dofollow) to learn more about electrical safety and compliance. For specific troubleshooting steps, you may check manufacturer forums and solar energy communities. These resources often include tips from other users.

4. Community Forums

Solar energy forums and social media groups offer a place to ask questions and share experiences. You can post your issue and get advice from other solar system owners. Many users share solutions for common problems like blown fuses or monitoring errors. Always verify advice with official sources before making changes to your system.

Support OptionHow to AccessBest For
Manufacturer SupportPhone, Email, WebsiteProduct-specific issues
Professional HelpLicensed Electrician/TechnicianComplex electrical problems
Online ResourcesManuals, Guides, WikipediaGeneral troubleshooting
Community ForumsSolar forums, Social mediaPeer advice and experiences

팁: Always document your maintenance and troubleshooting steps. This record helps you explain the problem when you contact support and makes future repairs easier.

If you need more information about electrical standards, you can visit IEC standards (dofollow) or UL standards (nofollow). These sites provide details about safety requirements for solar installations.

When you use support resources wisely, you keep your solar system safe and efficient. 😊


You can install a pv combiner box from kuangya electrical by following these key steps:

  1. Position and secure the box.
  2. Power down the system safely.
  3. Manage cable routing.
  4. Connect DC inputs using MC4 terminals.
  5. Complete output and grounding connections.
  6. Set up RS485 communication.
  7. Run a professional commissioning checklist.

Regular maintenance and correct wiring keep your solar installation safe and efficient. Combiner boxes protect your system and optimize power distribution. If you need help, consult certified professionals. Kuangya electrical products earn high customer satisfaction. You can confidently complete your solar project.

Certification Name설명
PV Installation Professional (PVIP)Validates competence in design, installation, and maintenance.
PV Design Specialist (PVDS)Recognizes advanced design skills for solar systems.
PV Installer Specialist (PVIS)Focuses on installation and safety plans.
PV Commissioning & Maintenance Specialist (PVCMS)Highlights expertise in operations and maintenance.

Learn more about IEC standards (dofollow) and UL standards (nofollow) for solar safety.

자주 묻는 질문

How do you choose the right PV combiner box size?

태양광 패널 스트링의 수와 전압에 따라 PV 결합기 상자를 선택합니다. 제조업체의 사양을 확인합니다. 쾅야 일렉트릭은 쉽게 선택할 수 있도록 사이즈 차트를 제공합니다.

What is the recommended maintenance schedule for a PV combiner box?

You inspect your PV combiner box every six months. Clean dust and debris regularly. Replace fuses and surge protection devices every two to three years. Follow IEC standards (dofollow) for best practices.

Can you install a PV combiner box outdoors?

Yes, you can install a PV combiner box outdoors. Choose a box with an IP65 or higher rating. Weatherproof cable glands and seals protect against moisture and dust.

What should you do if a fuse blows repeatedly?

You replace the fuse with the correct rating. If the problem continues, check for short circuits or faulty solar modules. Consult a licensed electrician for further troubleshooting.

Do you need surge protection in every PV combiner box?

You should install surge protection devices in each PV combiner box. These devices protect your system from voltage spikes. Type 2 SPDs work well for most solar installations.

How do you verify grounding in your solar system?

You use a continuity tester to check grounding connections. Inspect for corrosion and loose wires. Follow UL standards (nofollow) for grounding requirements.

Can you connect different brands of solar panels to one combiner box?

You can connect different brands if their voltage and current ratings match. Always check compatibility with the combiner box specifications. Use MC4 connectors for safe and reliable connections.

Where can you find more information about solar installation standards?

You visit IEC standards (dofollow) for global guidelines. For North America, review UL standards (nofollow). Manufacturer manuals also provide detailed instructions.